Half Term Halloween Fun - Lollipop Ghosts
The October Half Term is always family time for us here at A Mother's Ramblings and also time to prepare for Halloween too. In the past we've made decorations for our Trunk N Treat car boot design, decorations for our home, watched Halloween movies together, baked treats, carved designs into our pumpkins and worked on our costumes too.
This week is no different and we decided to make a few treats to give away during the Trunk N Treat our Ward is having on Halloween and we thought we'd share them with you too!
So, as you can tell from the title, this post is about how we made some Lollipop Ghosts. Spooky, cute and incredibly easy to make as this post will show you.
The first thing you need to do is gather your supplies.
You need a box of tissues, a box/bag of lollipops, ribbon, scissors and a pen.
I made it easier for the children to help me with this by cutting lengths of ribbon ready for them to tie around their tissues, and I suggest you do the same.
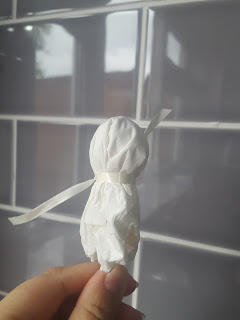
We tried a couple of different ways to put the tissue over the lollipop, and discovered that squares worked better, as shown in the image below!
We found that once we had gripped the tissue around the lolly, that if moved the tissue around, ensuring that certain parts were folded in and made neat that it gave a better overall look to the ghost and then we could quickly wrap the ribbon around just underneath the bulb of the lollipop.
We found we needed to tie the knots a couple of times, to get the right tightness and then we curled the ribbon edges just to stop them from sticking out at odd angles, but Dan Jon said they could be spooky ghost arms if we left them!
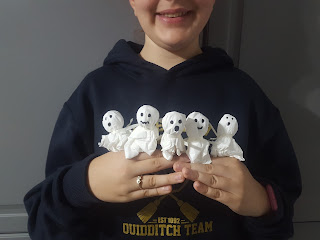
The next step is to add a face to the lollipop ghost, we found that simple designs worked best as being tissue, it does bleed a little and anything too complicated can look a bit messy.
So there you have it, a simple spooky treat to either give to Trick or Treaters that may visit your home this Halloween, or a cute treat for your own family!


